Sylvan Crafts – 6-Sided Die / Polyhedron Assembly
Things to consider before you assemble your Sylvan Crafts kit:
This model was laser cut from natural wood so will have burn marks and scorching. The burns and scorching actually add to the appeal and aesthetics of the wood, so we recommend you assemble your kit with the scorched side of each piece facing outward, for optimal attractiveness.
We recommend completing assembly in one sitting; although it is certainly possible to assemble the kit in multiple sessions. Assembling in one sitting allows for you to work while the glue is still a bit flexible, especially if something is slightly out of alignment. A typical first-timer assembly of this kit should take about 15–20 minutes.
Handy Tip:
Take a quick scroll through all the instructions below to familiarize yourself with the project before starting.Equipment Required:
- A good quality wood glue, such as Titebond/Titebond II (available at any home store). Wood glue will stay flexible as you work with the pieces.
- A craft mat, or some other work surface (not your nana's good dining room table) where you don't have to worry about glue getting on anything. Kitchen parchment paper (used in baking) makes a wonderful work surface when taped flat with painters’ tape.
- A handful of wooden toothpicks for applying glue.
Prepare for Assembly:
There are two types of pieces in this kit:
6 polygon (square) face pieces
24 mushroom-shaped joint pieces
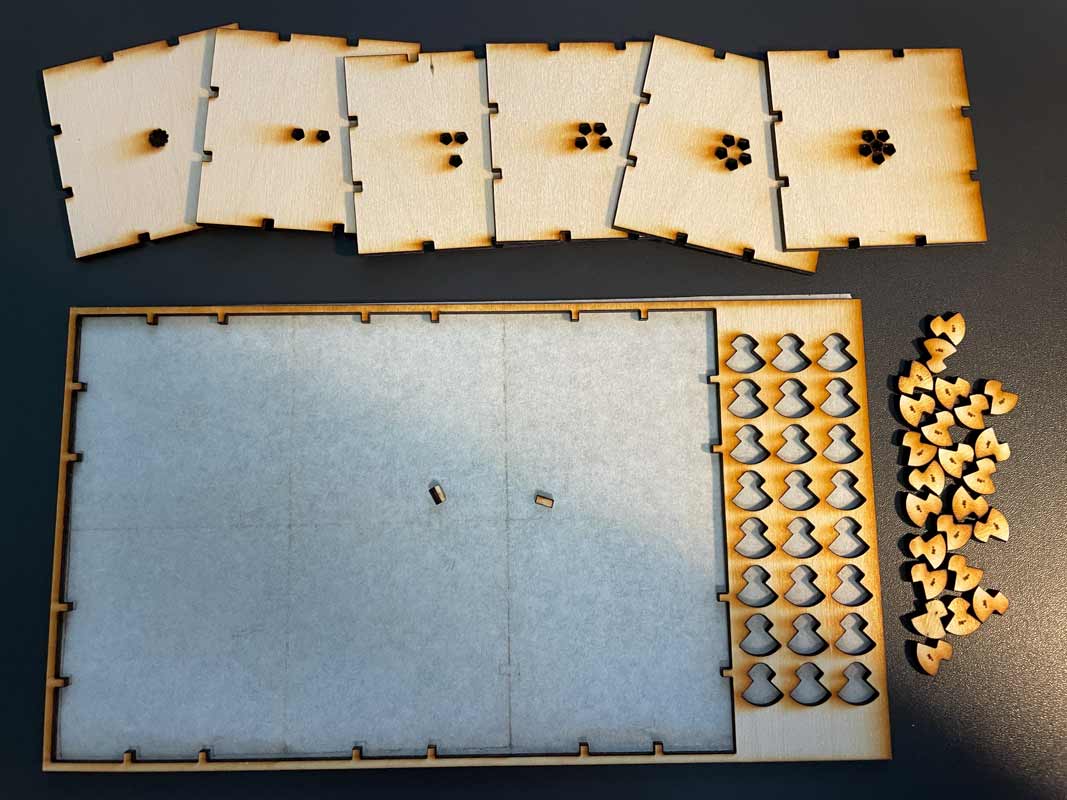
Separate Face Pieces and Joint Pieces From the Board:
- Peel top adhesive layer back carefully – exposing all pieces of the kit. NOTE: Some of the cutouts for the pips (holes in the face pieces) and sprue (junk between joint pieces) may stick to the adhesive paper. This is okay, as long as none of the small joint pieces are accidentally discarded.
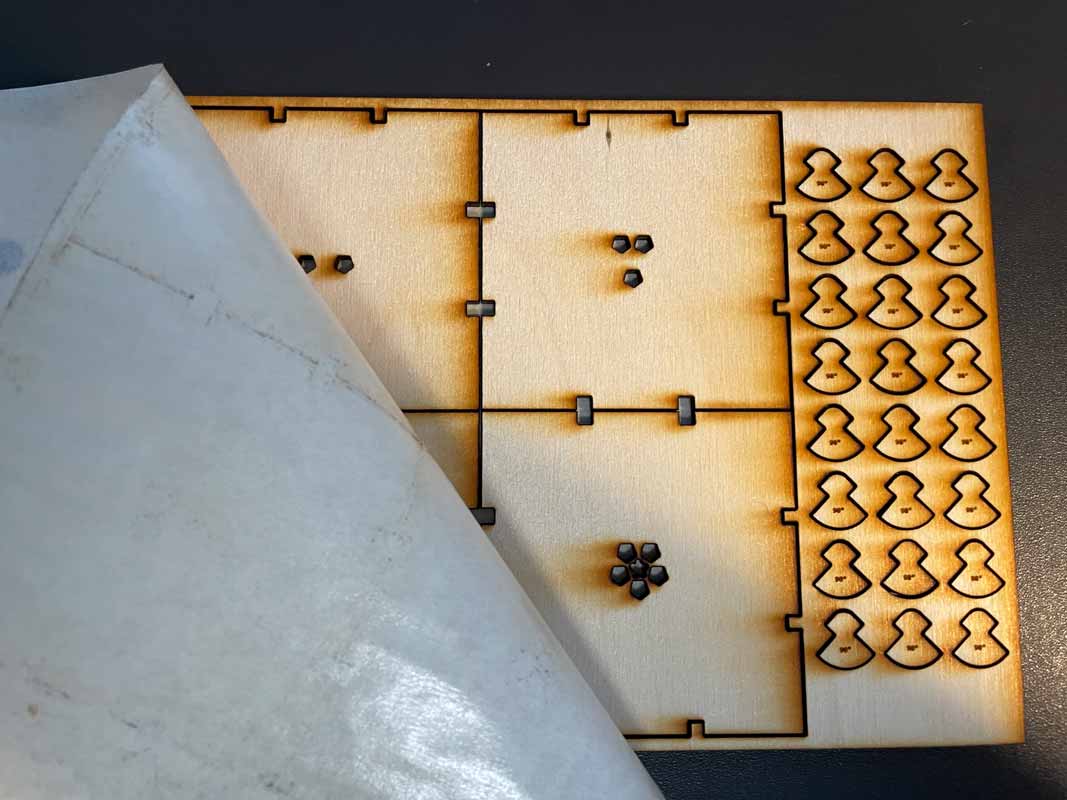
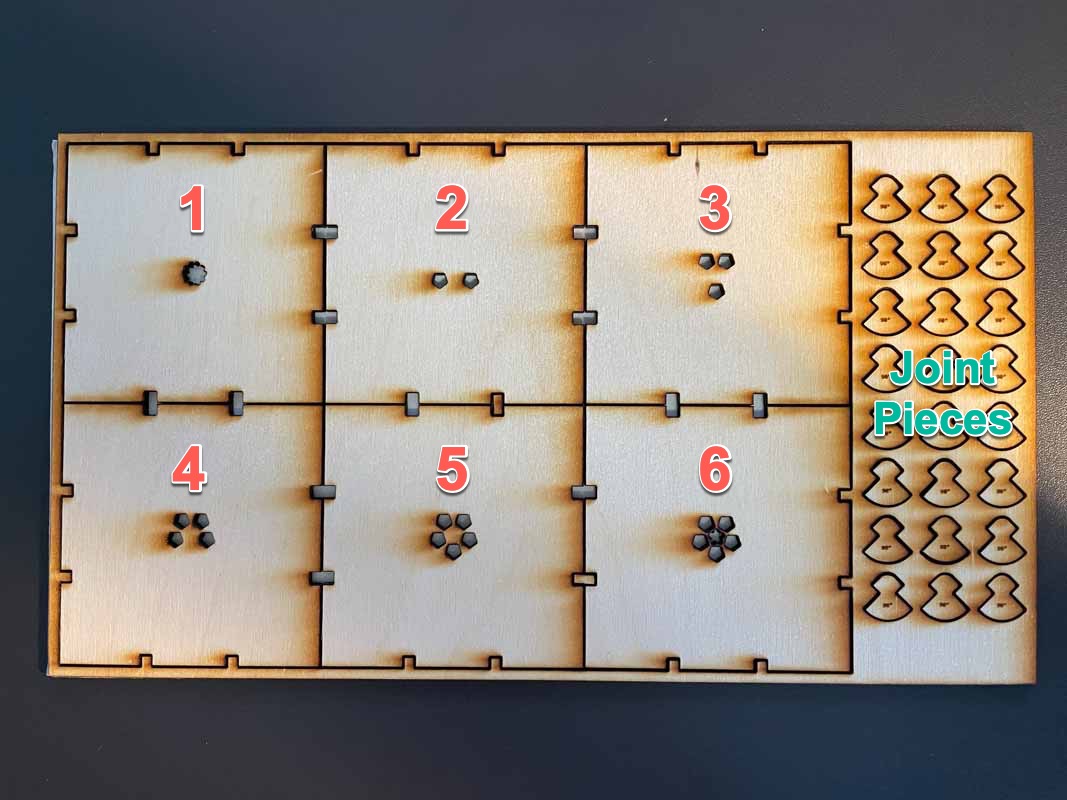
- Carefully remove all 24 joint pieces (the little mushroom looking guys) and place to the side – preferably in a little dish to keep them together.
- Carefully lift out the 6 square face pieces. You may need to use a toothpick to pop out any cutouts left in the pips of the face pieces. Usually the cutouts will stay stuck to the bottom adhesive paper. Stack the face pieces nearby in numeric order. Once you are sure there are no joint pieces or face pieces left, you can discard the board in your green yard waste recycle bin (adhesive paper and all).
Assembly:
Put a blob of glue (about the size of a bean) on your work surface so you can easily dip your toothpick into it during assembly. Start a fresh glue puddle as needed.Important:
You will only be adding glue directly to the joint pieces; never to the face pieces themselves. The right way to glue a joint piece is to use a small amount of glue and with your toothpick, just cover the inner edges of one side of a joint piece. See the pink highlighted areas in the image below for where to apply glue.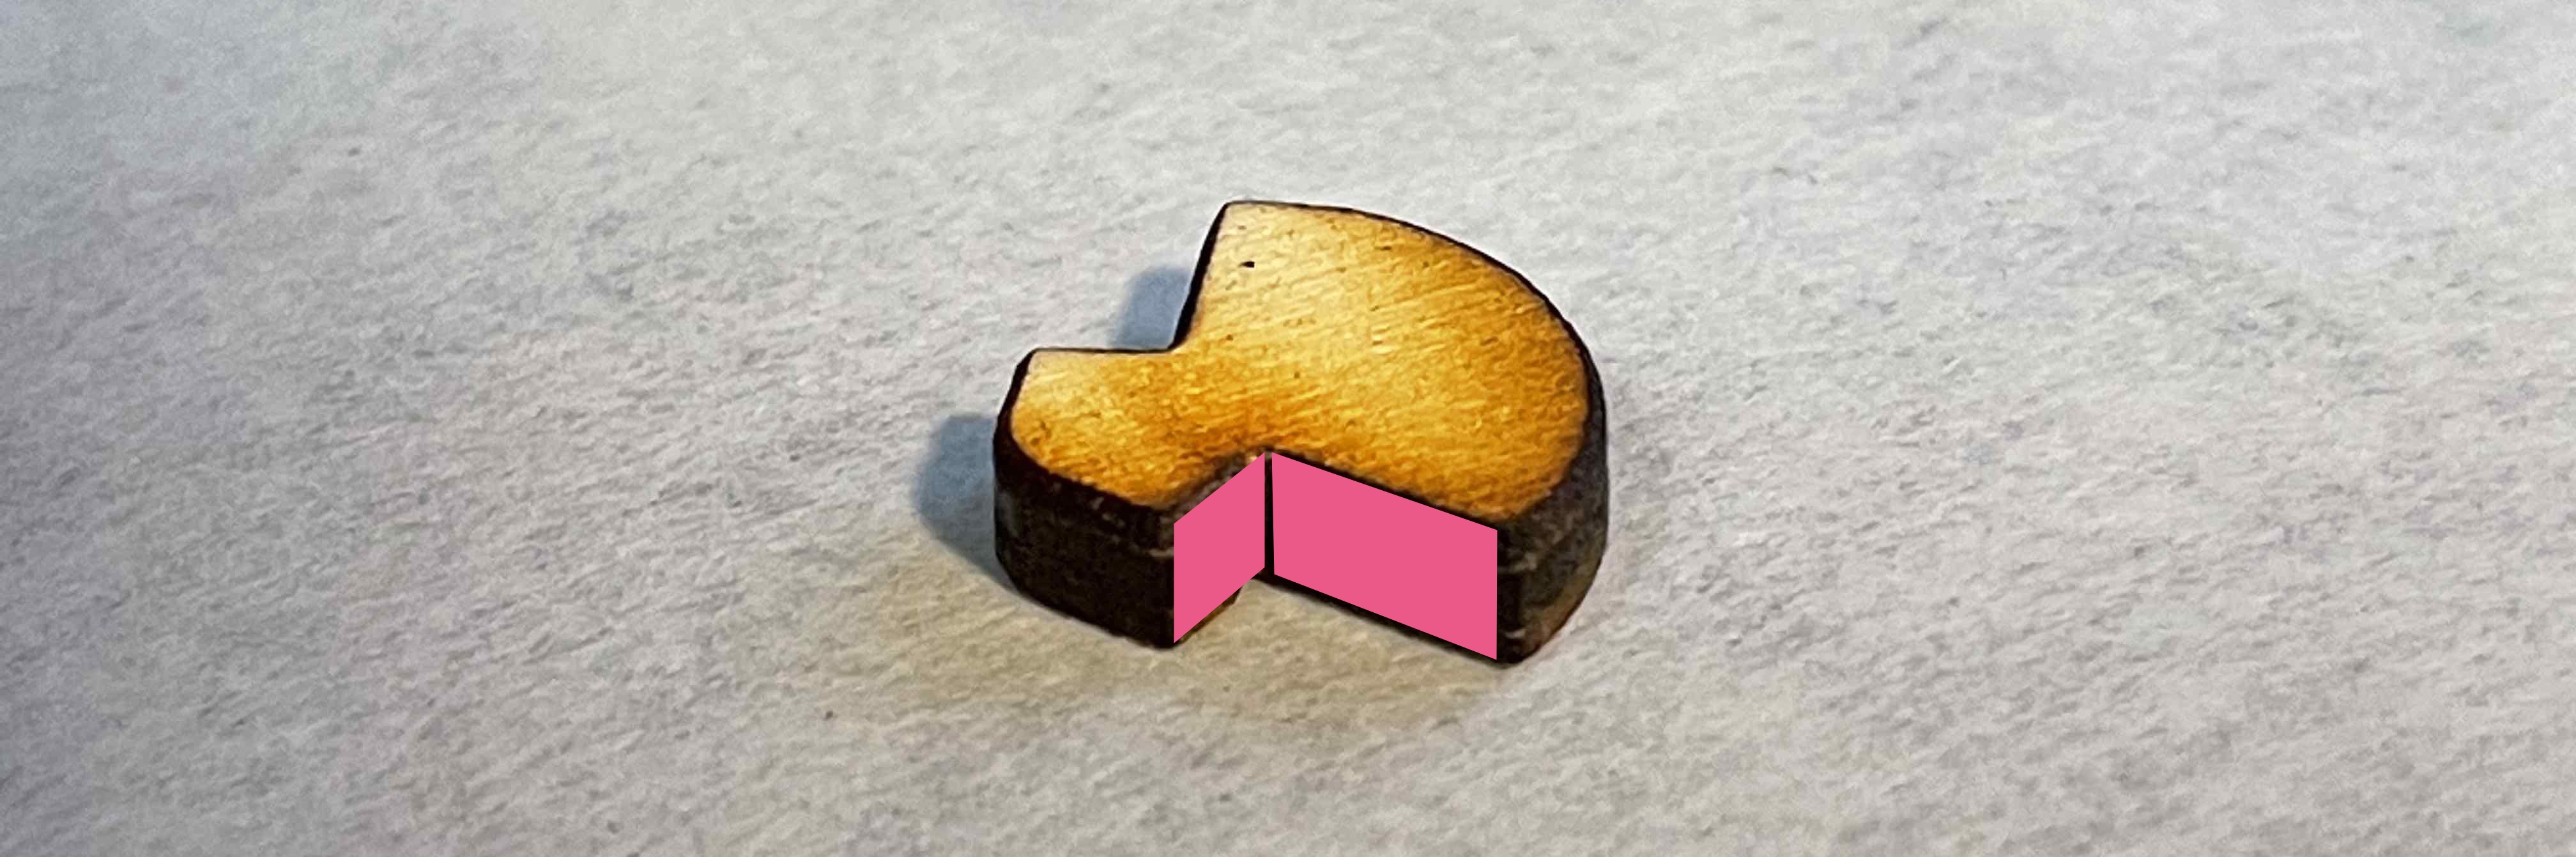
Remember:
Keep the scorched/charred side on the outside of the assembled kit so you can enjoy the beautiful coloration of the wood.Prepping Your First Face Pieces:
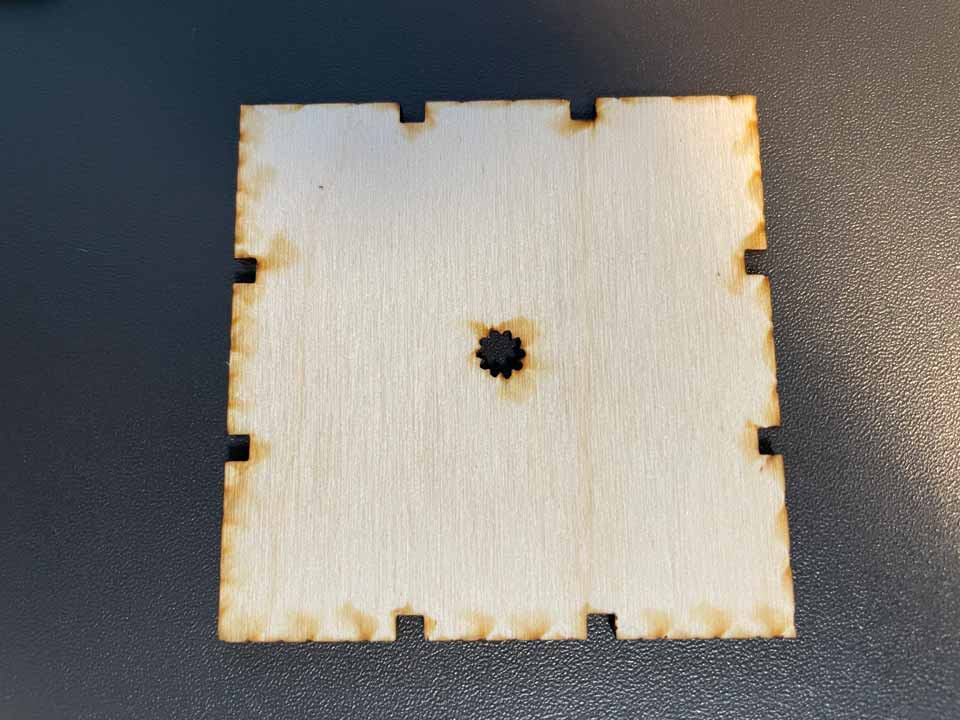
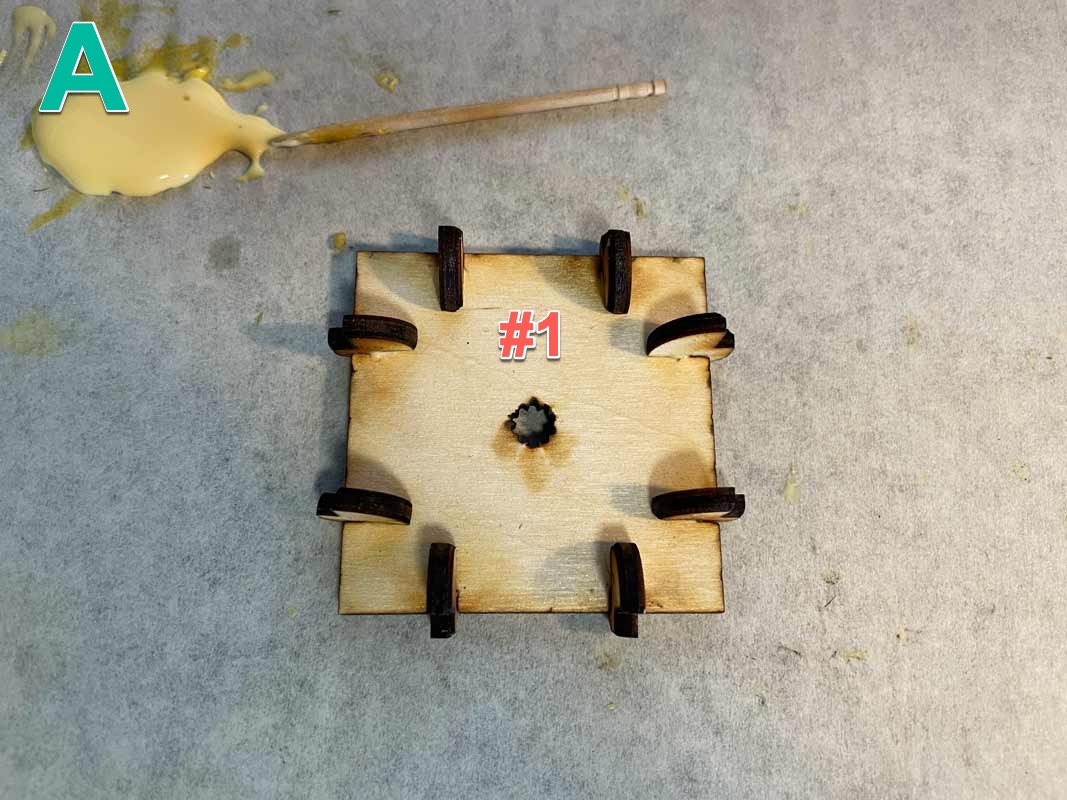
- Starting with face piece #1. Flip it over so the pale side is facing up (non charred side). Glue 8 joint pieces to the #1 face piece as seen in image A below. As the glue begins to dry, snug the joint pieces again against the face piece to ensure they are seated tightly. Set aside to dry for 3 minutes.
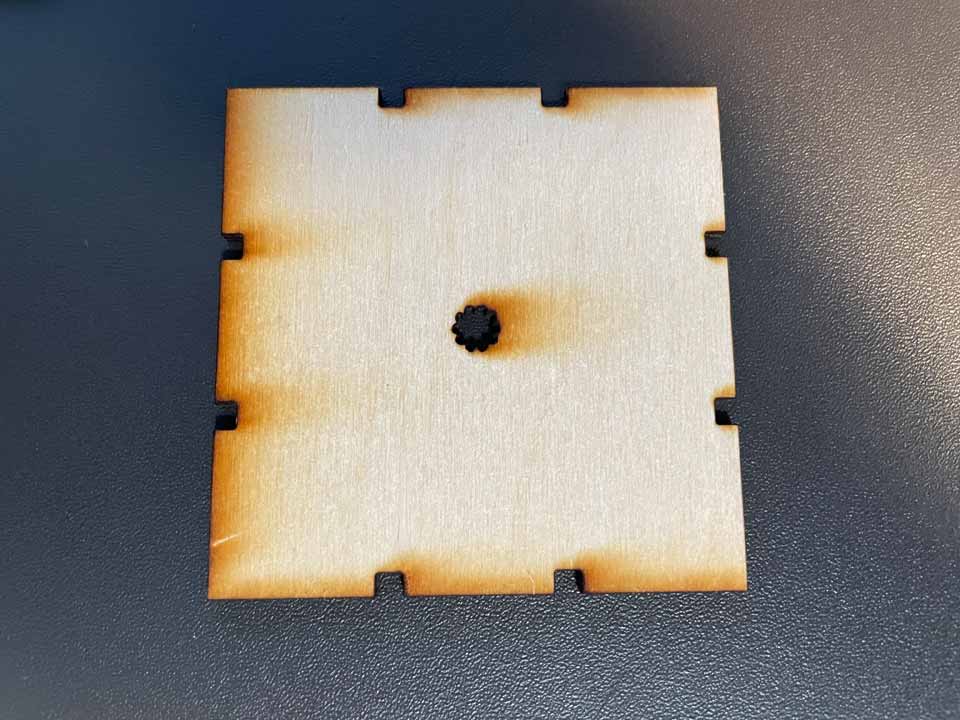
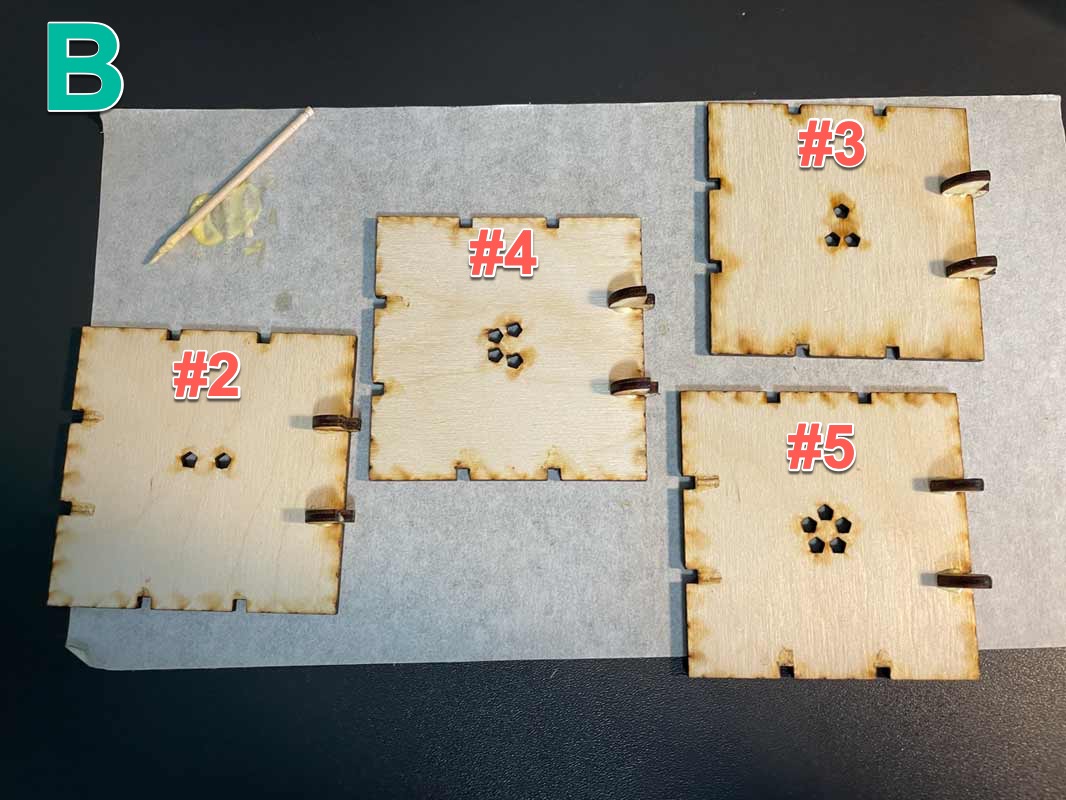
- Select face pieces #2, #3, #4, and #5. Glue two joint pieces on one edge of each of these pieces as seen in image B below. Allow these to dry for a couple minutes.
Assembling the Faces:
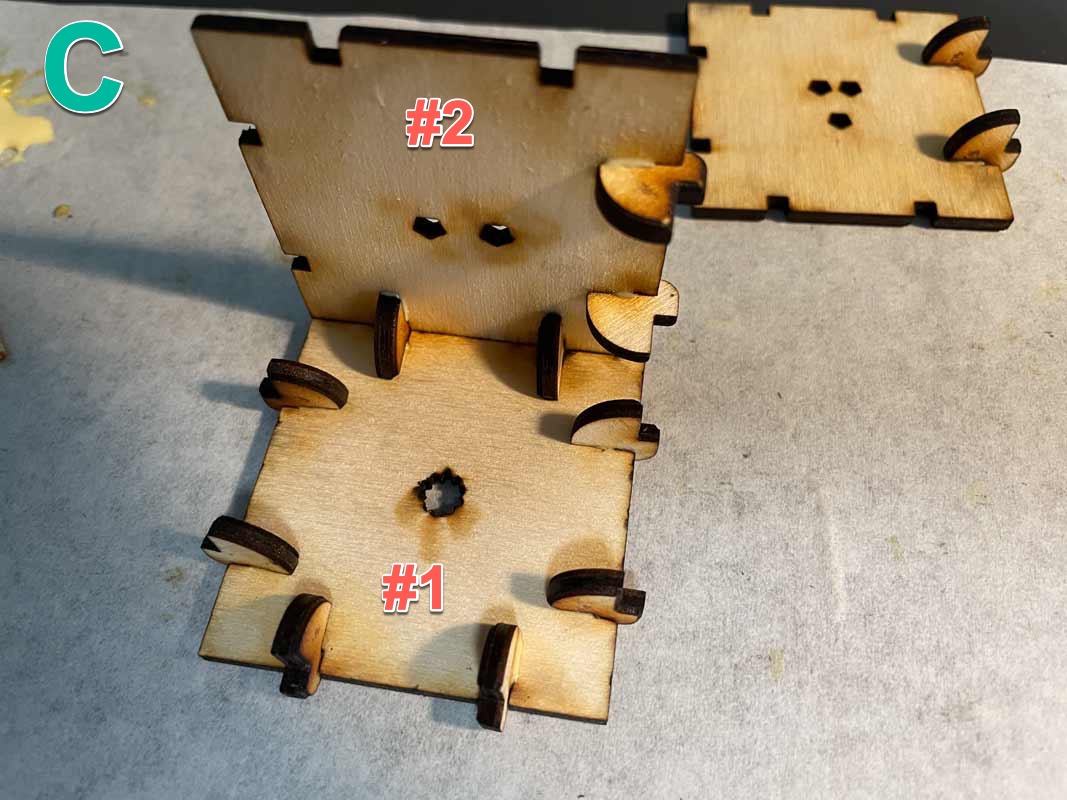
- Apply glue to two of the joints on face piece #1. Starting with face piece #2, attach the edge of face #2 to face piece #1 with the joint pieces of face #2 facing to the right as in image C below.
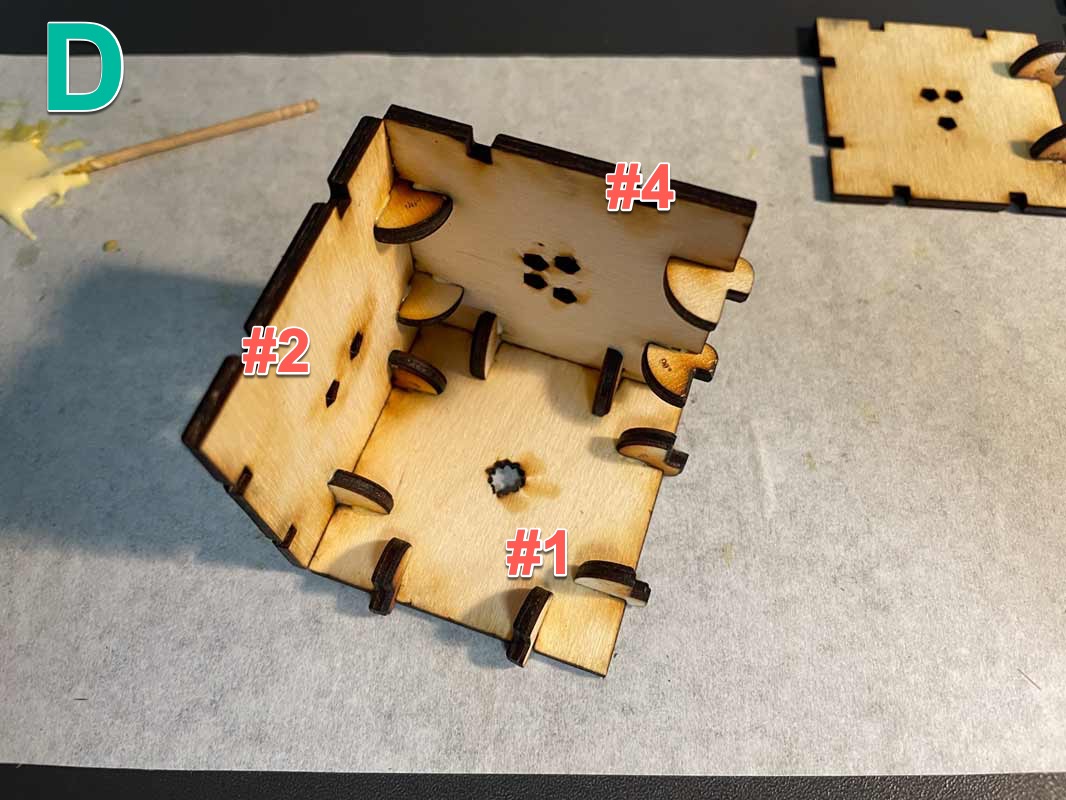
- Add glue to the two joints on face #2 and to the two joints on that same side of face piece #1. Attach face piece #4 between face #1 and face #2. Your construction should look like image D below.
- Next, apply glue to the two joints on face piece #4 that you added in the last step and to the two joint pieces on the base piece #1 on that same side (refer to image D for reference). Attach face piece #5 to face #4 and base face piece #1 with the joint pieces of face #5 facing to the right again as seen in image E below.
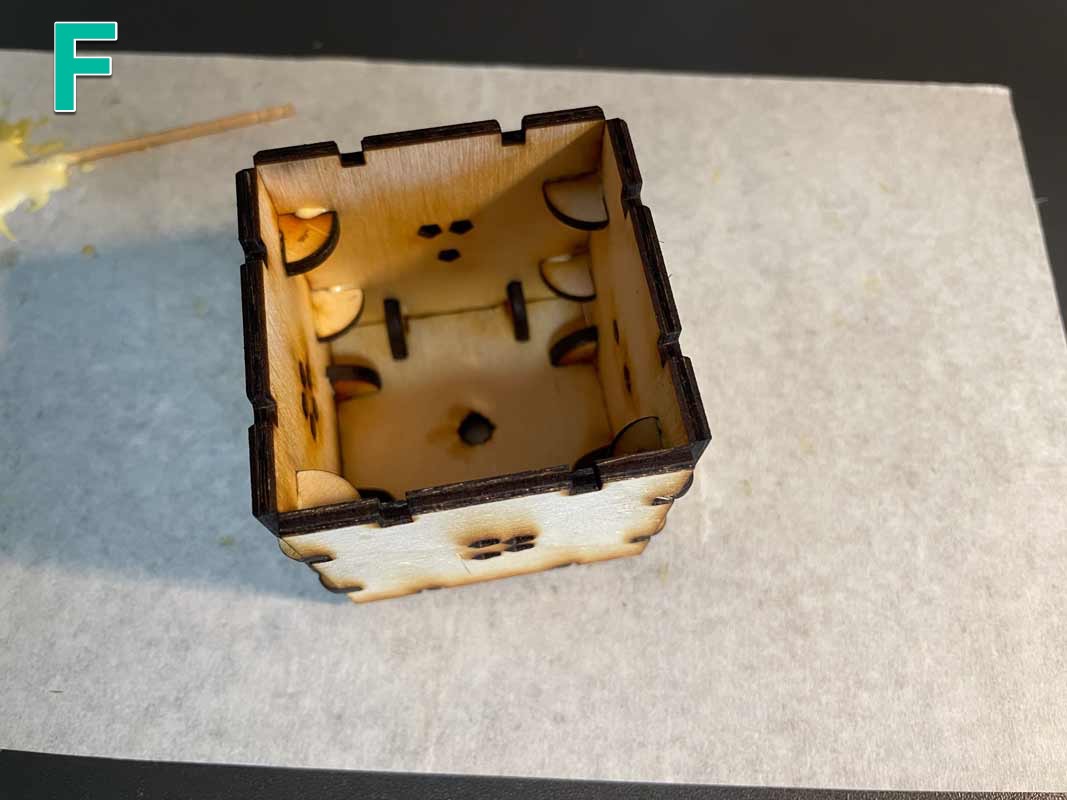
- Last, apply glue to the two joints on face piece #5 that you just added in the previous step and to the two joint pieces on the base piece #1 on that same side. Also apply glue to the two joints on face piece #3, since this is the last piece to complete the perimiter of the polyhedron. Attach face piece #3 between face #2 and #5 and with the bottom face piece #1 as in image F below. Once the piece is in place, use your hands and fingers to cup the pieces together gently for a snug fit taking special care to apply light pressure at the base and joints. You're almost finished!

Final Steps:
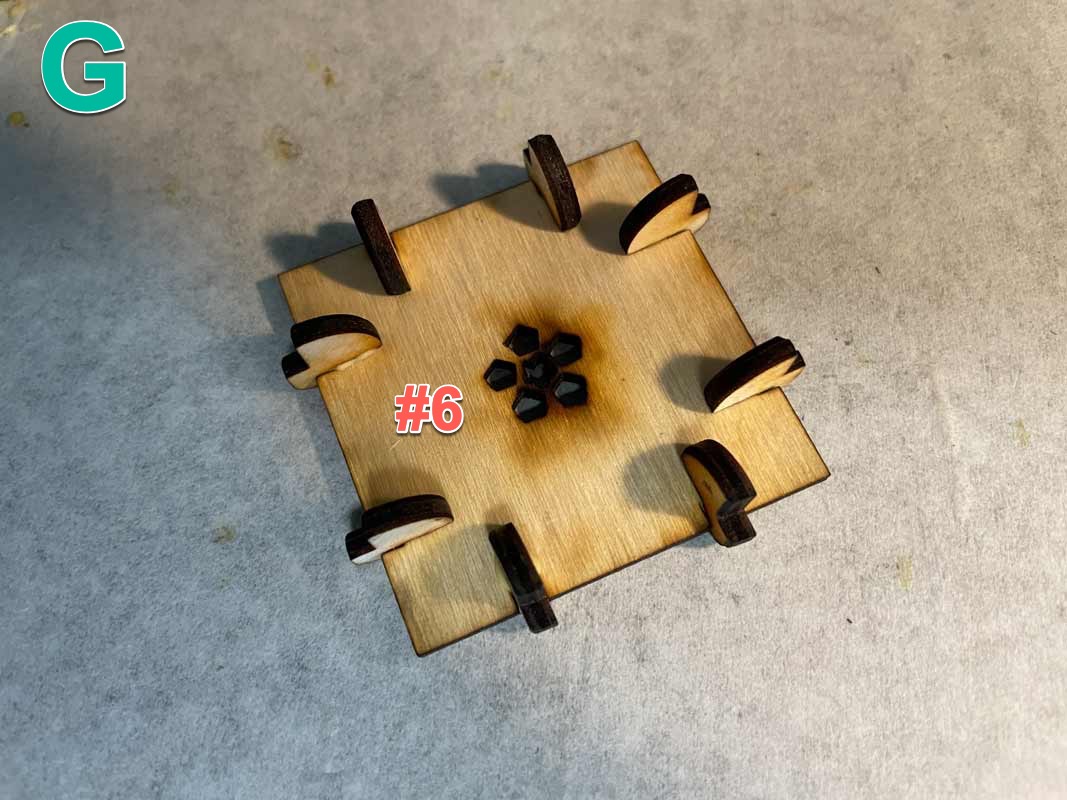
- Glue the remaining 8 joint pieces to the last face piece #6. Remember to attach these joints on the pale (non-charred) side as seen in image G below. Do your best to make sure these joints are all glued straight and perpindicular to the #6 base pice so this will fit easily onto the partially completed polyhedron from image F.
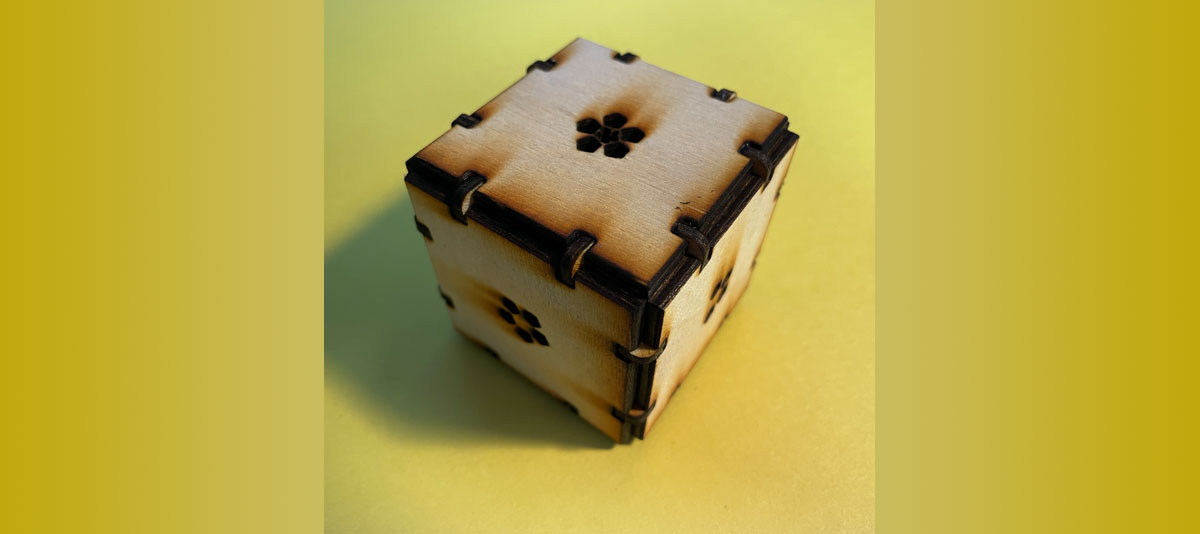
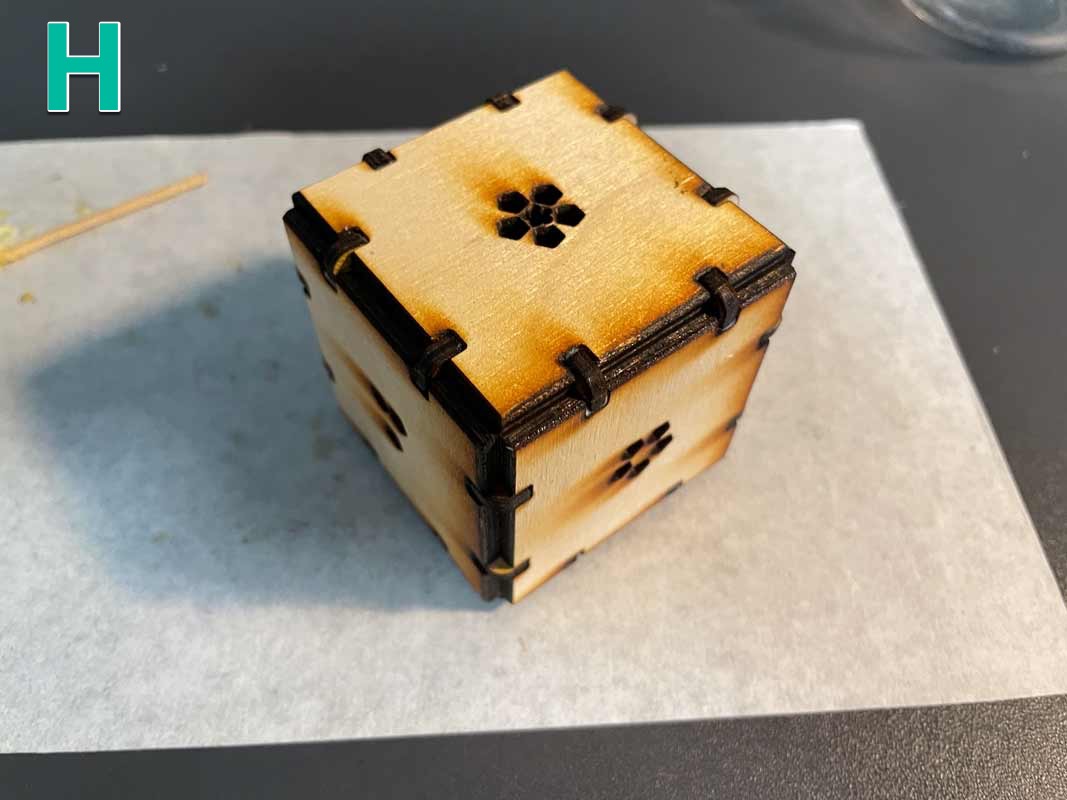
- Finally, apply glue to all 8 joints on face piece #6. Line up the last piece to the open end of the polyhedron and lower into place. If your joints were all glued straight, it should slide into place fairly easily. Your final polyhedron die should look like image H below. If needed, you can use a hobby knife or other pointy non-marking object to help tweak the joints into place to close up your cube-shaped die. Cup the die again gently applying pressure to make sure everything is snug with your final construction.
Congratulations! You have a beautiful peice of wood art!
Feel free to apply a light stain or coat with varnish or polyurethane for beauty and strength.